
Quick Summary
Troubleshooting electric gate problems safely requires a structured diagnostic method to prevent costly damage, mechanical strain, and entrapment hazards. As Alhambra's premier gate repair authority, Ironworks Gate Co. provides actionable troubleshooting steps to resolve power loss, optical sensor blockages, structural hinge sag, track debris, and blown motor capacitors. Readers will gain the knowledge needed to pinpoint gate malfunctions or call Ironworks Gate Co. at (747) 277-8422 for 24/7 assistance and same-day professional diagnostic repairs.
How to Fix Electric Gate Problems Fast – Step-by-Step Guide
When an automated driveway gate stops working, diagnosing the issue systematically can save you hours of frustration and prevent costly, unnecessary part replacements. Automated gates can pose entrapment, crushing, and electrocution risks when safety devices are missing or disabled. Pinpointing the root cause safely before forcing any mechanical movement protects both your equipment and your household.[3]
As noted by Ironworks Gate Co., common gate issues typically stem from power loss, sensor issues, mechanical binding, debris along tracks or hinges, dead batteries, or capacitor and control faults. This guide covers how to systematically isolate and troubleshoot these problems step by step.
What You’ll Need: Safety Protocols and Diagnostic Checklist
Before testing electrical components, switch off the primary power source and gather basic diagnostic tools.
Required Diagnostic Tools and Equipment
- Digital Multimeter: To test incoming line voltage, low-voltage control circuits, and start/run capacitors.
- 4-Foot Level and Socket Set: To check whether hinge posts have pulled out of plumb and to adjust mechanical stops or mounting brackets.
- Microfiber Cloth and Dry Silicone Spray: To clean optical photo-eye lenses and lubricate hinge pins without attracting abrasive road grit.
- Manual Release Key: To safely disengage the drive arm or chain drive from the gate leaf.
Gate Safety Precautions Before You Begin
- Shut Off Power at the Main Breaker: Always flip the dedicated circuit breaker before opening the operator housing or touching terminal blocks.
- Never Force an Operator: If a gate binds or stops partway through its cycle, forcing it with the motor can burn out the drive gears or snap internal linkage arms.
- Keep Clear of the Swing or Travel Path: Ensure no people, pets, or vehicles are within the operating radius while running test cycles.
Step 1: Check the Power Supply, Breakers, and Operator Reset Switches
The simplest reason an electric gate will not open or respond to commands is a loss of primary electrical power. Surges from storms, utility fluctuations, or moisture in exterior conduit frequently trip breakers before any hardware is damaged.
Verifying High-Voltage Input and GFCI Outlets
- Check the Service Panel: Locate the dedicated breaker for the gate operator on your main electrical panel or sub-panel. Reset any tripped switches firmly to the OFF position, then back to ON.
- Test the Outdoor GFCI: Many gate systems draw power from an exterior GFCI outlet located near the operator. Press the “Reset” button on the receptacle to restore power down the line.
- Check the Low-Voltage Transformer: On solar or battery-backed systems, check the inline fuse on the control board and confirm the transformer is supplying secondary voltage.
Performing a Clean Gate Motor Reset
To perform a logic reset, turn the power switch inside the operator enclosure to OFF. Leave the power disconnected briefly to allow the control board to reset completely, then turn the switch back on.
Step 2: Inspect and Clean Photo-Eye Safety Sensors
Need electric gate problems?
We’re available now - call for a fast, free estimate.
Safety photo-eyes are designed to prevent the gate from closing on vehicles or pedestrians. If the infrared beam is interrupted, the control board will keep the gate stuck open or immediately reverse it when a close cycle starts.[2]
Clearing Environmental Obstructions and Debris
Because photo-eyes sit close to the ground, they are exposed to garden debris, dirt, and insects. Wipe both the emitter and receiver lenses with a clean microfiber cloth. Remove any spiderwebs, weed growth, or hard-water deposits left behind by lawn sprinklers, as mineral scale can scatter infrared beams.
Testing Sensor Alignment and Indicator LEDs
- Inspect the Status Lights: Look at the LED on the receiving photo-eye. A solid LED generally indicates a clear, aligned beam. A blinking or unlit LED means the beam is blocked or out of alignment.
- Adjust the Mounting Brackets: Loosen the bracket screws slightly and adjust the angle until the status light turns steady. Tighten the hardware securely so wind vibration does not knock it out of place.
- Shield from Sun Glare: In east-west driveway layouts, low morning or late-afternoon sun can blind the optical sensor. If the gate only fails at specific times of day, install a small hood or visor over the receiving lens.
Step 3: Test Structural Alignment, Post Deflection, and Hinge Sag
Mechanical binding or hinge sag can often prevent a gate from operating smoothly. According to Ironworks Gate Co., when swing gates place pull on their mounting posts, post deflection or worn hinges can cause friction and binding.[4]
Identifying Hinge Post Lean and Structural Binding
Use your manual release key to disconnect the drive arm from the gate. Push the gate open and closed by hand. It should glide through its entire arc smoothly. If you feel heavy resistance, scraping, or binding, the issue is structural:
- Check for Plumb: Place a 4-foot level against the inside and side faces of the hinge post. If the post leans toward the driveway, the gate leaf will dive toward the ground as it swings.
- Inspect Hinge Bearings: Look for metal shavings, rust streaks, or dry ball bearings. Grease the hinge zerks or apply heavy-duty synthetic lubricant to the pivot points.
- Inspect Mounting Welds: Check where the hinge brackets connect to the steel post for hairline stress cracks caused by high winds.
Checking Swing Clearance and Driveway Friction
Driveway settling or tree roots can cause pavement to lift over time. If the bottom edge of a swing gate drags against the ground, the operator may detect the resistance as an obstruction and reverse or shut down to protect the motor.
Step 4: Clear Corroded Slide Tracks, Rollers, and Ground Debris
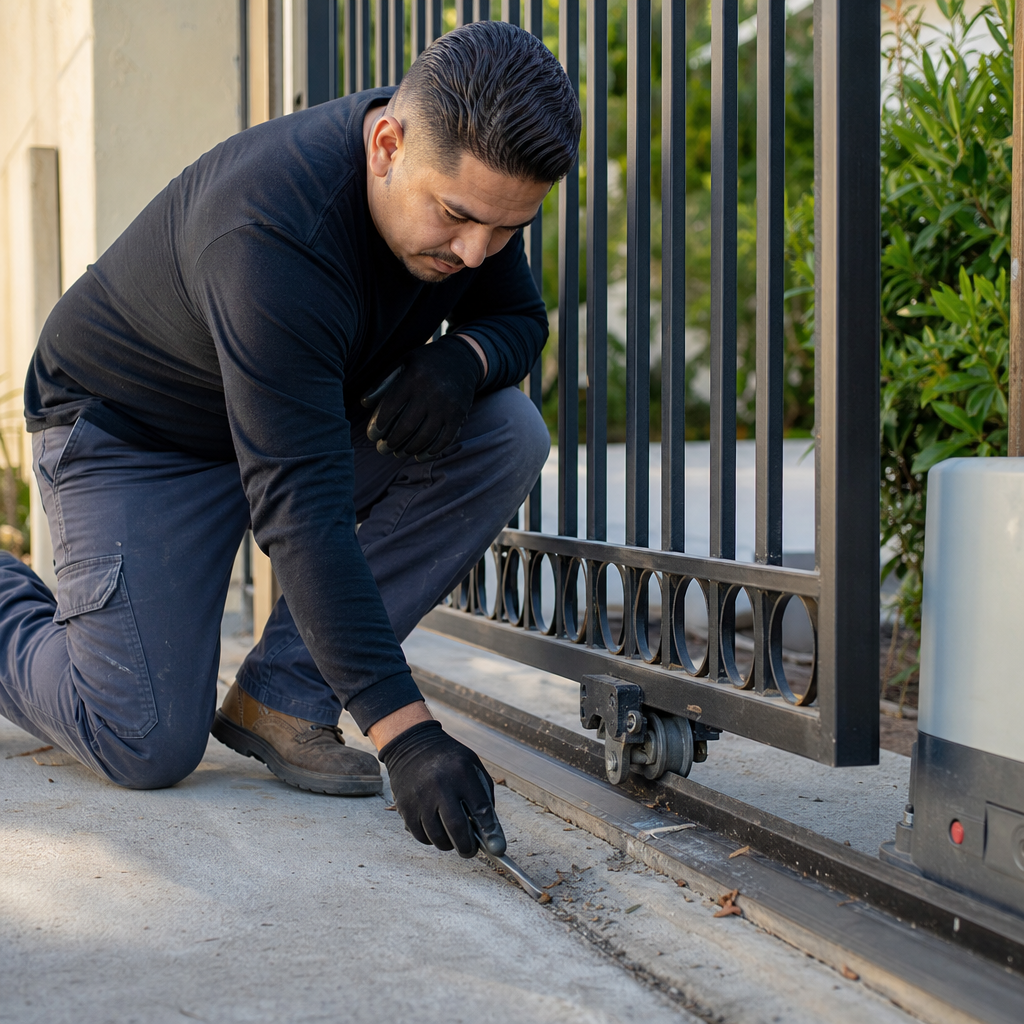
For sliding gates, smooth rolling hardware is mandatory. Modern gate operators use internal current sensors (inherent reverse systems) that cut power whenever rolling resistance exceeds a set threshold.
Removing Hard Water Scale and Dirt
Ground-mounted V-tracks collect gravel, compacted soil, and hard-water deposits from landscape watering. Scrape down the length of the track with a stiff wire brush to remove rust flakes and calcium scale. Ironworks Gate Co. advises against applying thick automotive grease to ground tracks; grease mixes with road dust to create a grinding paste that destroys roller bearings. Instead, keep the track clean and dry or use a dry silicone film.[1]
Inspecting V-Groove Wheels and Internal Bearings
Inspect the bottom roller wheels for flat spots, gouges, or seized internal bearings. If the wheel does not spin freely on its axle bolt, the motor has to drag the full dead weight of the gate across the track, quickly burning out the drive belt or stripping the internal worm gear.
Step 5: Diagnose Motor Humming, Blown Capacitors, and Board Faults
Need electric gate problems?
We’re available now - call for a fast, free estimate.
If the gate moves freely by hand, the safety sensors are aligned, and power is reaching the unit, the issue lies within the operator’s internal drive components.[5]
Troubleshooting a Motor That Hums but Will Not Move
When you trigger an open command and hear an electric gate motor humming but nothing moves, the most common culprit is a failed start/run capacitor on an AC drive unit:
- AC Motor Capacitors: Single-phase AC motors rely on a start capacitor to generate the torque needed to start moving the gate. When a capacitor bulges, leaks oil, or fails internally, the motor hums loudly under load and eventually trips its internal thermal overload switch.
- Travel Limit Switches: Check if the physical limit switch or magnetic reader is stuck in the triggered position. If the board detects that the gate is already at its end-of-travel point, it will not engage the motor in that direction.
Inspecting Circuit Boards and Wiring
Open the operator control box and look for physical signs of damage:
- Inspect the board for black scorch marks, burnt traces, or blown glass fuses.
- Check for pest intrusion. Geckos, snails, ants, and spiders often enter warm control boxes and short out the solder points on the back of the circuit board.
- Verify that all wire terminals are snug. Vibration from gate cycling can loosen low-voltage screw terminals over time.
Step 6: Test Remote Clickers, Keypads, and Access Controls
If the operator functions when you press the internal manual test button on the board, but does not react to outside inputs, your issue is isolated to the access control peripherals.
Fixing Radio Interference and Transmitter Range
- Test Transmitter Batteries: Weak batteries may light up an indicator LED while lacking enough power to broadcast a strong radio signal to the receiver.
- Check the Antenna Wire: Ensure the coaxial or single-strand copper antenna wire hangs straight down outside the metal operator box. Metal enclosures block radio frequency signals if the antenna is tucked inside.
- Reprogram the Remote: Clear the receiver’s memory and run through the learn sequence again to rule out corrupted rolling codes.
Checking Keypads and Exit Loop Detectors
As specialists at Ironworks Gate Co. observe, wired safety loops cut into driveway asphalt can degrade when cracks let water seep around the loop wires, creating ground faults. A faulted exit loop detector will hold a constant active signal, keeping the gate open indefinitely. Check the diagnostic lights on the loop detector module inside the operator cabinet to verify whether it is stuck in a continuous detection state.
Step 7: Evaluate Repair vs. Replacement Considerations
Not every gate issue justifies buying a completely new system. Knowing which components can be rebuilt saves money while maintaining safe, reliable operation:
- Repairable Issues: Bad start capacitors, broken limit switches, worn roller wheels, dirty photo-eyes, blown fuses, and leaning hinge posts that can be shimmed or reinforced with structural sleeves.
- Replacement Triggers: Cracked operator gearboxes, obsolete circuit boards with no available replacement parts, heavily corroded motor housings, or gates lacking monitored safety inputs required by modern safety standards.
Frequently Asked Questions About Electric Gate Problems
Why is my electric gate not opening or closing?
The most frequent causes are a tripped breaker, an interrupted safety photo-eye beam, or dead remote batteries. If the system receives power and the safety devices are clear, disconnect the gate using the manual release key to check for mechanical binding or track friction.
How do you fix a stuck electric driveway gate?
First, locate your manual release key or disconnect pin to disengage the drive mechanism from the gate. This allows you to open or close the gate by hand to clear driveway access. Once disengaged, check for physical obstructions along the track, clean the safety sensors, and perform a power reset at the breaker.
What causes an automatic gate motor to stop working?
Gate motors usually stop working due to loss of main power, blown control board fuses, failed start capacitors, damaged limit switches, or excess mechanical friction that trips the internal overload sensor.
How do I know if my electric gate sensor is malfunctioning?
Look at the LED lights on the sensor face. A steady light indicates proper alignment and operation. A flashing or dark LED means the infrared beam is misaligned, blocked by dirt or cobwebs, blinded by direct sunlight, or disconnected from its power supply.
Can you manually open an electric gate during a power outage?
Yes. Many gate operators include a manual release mechanism. Swing gate arms typically use a keyed cylinder or release handle on top of the operator body, while slide gate units use a mechanical clutch release or a quick-release pin on the drive chain bracket.
Why is my automatic gate opening or closing on its own?
Ghost cycling is commonly caused by shorted wires in hardwired pushbuttons or keypads, moisture inside an exterior safety edge, radio frequency interference on older dip-switch remotes, or a faulted ground loop detector holding an active vehicle trigger.
How much does professional electric gate repair cost?
Repair costs vary depending on the specific failure, required replacement components, and local labor rates. According to Ironworks Gate Co., minor repairs such as sensor realignments, capacitor replacements, or remote programming generally cost less than extensive repairs involving structural realignment, control board replacement, or loop rewiring.
Need electric gate problems?
We’re available now - call for a fast, free estimate.
Sources
- [PDF] 2024-11-20-COPF-CODD-Hummingbird-Alliance-Meeting-Log.pdf – cpsc.gov (2024)
- [PDF] 2015 Annual Report – Consumer Product Safety Commission – cpsc.gov (2015)
- New Safety Standard for Automatic Security Gates Helps … – cpsc.gov (2001)
- Gate Accidents – The needless loss of life continues – gate-safe.org (2022)
- Major accidents involving automated gates and lessons … – gate-safe.org (2016)
Related reading: Automatic Driveway Gate Repair – Call Now-10% Off – On-Site in 60 Minutes – Free Estimate
Related reading: How to Manually Open Electric Gate – 10% Off & Free Estimate – Same-Day Service
Related reading: How to Open Electric Gate Manually | Call Now-10% Off | Same-Day Service | Free Estimate
Frequently Asked Questions
How can I tell if a humming gate motor is caused by a blown capacitor versus a seized gearbox?
If you disengage the manual release and the gate leaf slides or swings freely by hand, a humming motor typically indicates a failed start capacitor or stuck limit switch rather than internal gear damage. Because AC motor capacitors store hazardous electrical charges, Alhambra property owners can call Ironworks Gate Co. at (747) 277-8422 for safe, same-day component testing and replacement.
How do I fix an electric gate stuck open due to a faulted driveway exit loop?
Inspect the loop detector module inside the operator housing to see if the diagnostic LED shows a continuous vehicle detection signal. You can temporarily unplug the loop harness from the control board to allow the gate to cycle closed until repairs are made. For damaged underground wiring, Ironworks Gate Co. provides precision diagnostic testing and same-day loop detector replacements.
When is it necessary to call for professional electric gate repair instead of DIY troubleshooting?
You should halt DIY troubleshooting and call a professional if you observe scorched circuit boards, structural post lean with cracked welds, or persistent electrical short circuits. Ironworks Gate Co. offers 24/7 assistance at (747) 277-8422 to provide comprehensive on-site diagnostics and rapid repairs throughout Alhambra.
About the author
 |
Sarah Miller Sarah is a seasoned technical writer with over 8 years of experience in the home services industry, specifically focusing on automated gate systems and property access control. She holds a B.A. in Communications from California State University, Fullerton, and works closely with licensed technicians to translate complex mechanical and electrical repair processes into accessible, transparent guides for homeowners and property managers. Her expertise lies in breaking down gate repair costs and maintenance best practices for Southern California residents. |
Gate not opening, off track, or opener dead?
We’re available now - call for a fast, free estimate.
Call Now - Free Estimate